
Buttons and Components
Add to favorites
Creating knobs and buttons elements and turning them to components
Play video
Create 3D UI for iOS and visionOS in Spline
1
Intro to Spline for iOS and visionOS
7:25
2
Basic Shapes in 3D Smart Home
10:12
3
Materials, Lights and Effects
12:11
4
Camera Animation and States
7:05
5
3D Thermostat and Cloner
14:38
6
Buttons and Components
8:26
7
Path Animation and Rotation
7:10
8
Create a 3D iOS App Icon
7:09
9
Create a visionOS App Icon
9:53
10
Create 3D UI Scene
9:49
11
Particles Animation
20:30
12
Export to SwiftUI Project
16:20
Let us complete our thermostat design by adding the final two elements: the knob and the temperature buttons. We will learn how to work efficiently by transforming these elements into a single component.

Step 1 : Button Knob Creation
Start with the base.
- Create an ellipse with dimensions of 44x44, apply an extrusion value of 4, duplicate it, and adjust the duplicate to 36x36.
- Select both ellipses, navigate to the "Boolean" operations menu, and perform a "Subtraction" to form a single ring-shaped object.
- Adjust the smaller ellipse's position forward along the Z-axis to introduce depth.
- Copy the smaller ellipse outside the Boolean group, resize it to 34x34, and adjust its Z-axis position for a depth effect.
- Group all ellipses and rename the group to "knob".
 Add materials to our knob base.
- Apply a blue color to the boolean group and add a new material named 'rainbow' and position it below the 'lighting' layer. Then, change the blending mode to 'Screen'.
- Add a fourth material and choose 'Depth' as its type. Set both color to cyan, with the first one at 0% and the second at 100%. Arrange the color stops as follows.
- Switch the gradient type to 'Linear.' Adjust the Y value of the direction to minus 21. Then, set the near and far values to minus 29 and 26, respectively.
- Incorporate the final material and select 'Matcap' to project a texture onto the shape. select the first option on the top left and Change the blending mode to 'Screen'.
 Add materials to our knob button.
- Copy effects from the boolean group to the single ellipse, make slight modifications for contrast.
- Remove the 'rainbow' layer, then adjust the 'lighting' layer's opacity to 80% and change its blending mode to 'Overlay'.
- On the 'depth' layer, arrange the color stops as follows. Reset the Y value of the direction to 0. Adjust the near and far values to minus 20 and 7, respectively. Change the blending mode to 'Overlay'.
- Add a new 'outline' material and set the outline color to white with a width of 1. Adjust the layer's opacity to 50% and change its blending mode to 'Overlay'.
- Position the 'matcap' layer at the forefront and make sure its blending mode is set to 'Screen.'
- Place your knob button on the thermostat, ensuring it is accurately positioned near the large progress ring along the Z-axis.

Step 2 : Temperature Button
Adding a 'Plus' Button
- Start by replicating the 'Knob' group, rename it to 'Plus Button,' and position it at the thermostat's base.
- Within the 'Boolean' group, adjust the larger ellipse to 56x56 with an extrusion of 10.
- Modify the smaller ellipse to 46x46, maintaining an extrusion depth of 10.
- Resize the final ellipse to 44x44 with a reduced extrusion depth of 5 and pull the Z-axis forward to achieve the desired extrusion effect.
Applying Materials
- Copy materials from the base layer and paste them onto the Boolean group.
- Detach the Boolean group before making exclusive adjustments to its materials to avoid simultaneous changes with the base layer.
- For the 'Depth' layer within the Boolean group, adjust the 'Origin' values (X to 0.21, Y to 49, Z to -23), the 'Near' value to 1.80, and the 'Far' value to 84.
- Apply an 'Outline' material with the outline color set to white, width to 1, and blending mode to 'Overlay'.
- Copy the materials from the Boolean group and apply them to the individual ellipse, making necessary adjustments to the 'Depth' layer by adjusting the 'Origin' values: set x to minus 7, y to 16, and z to minus 7. Update the 'Far' value to 37 and arrange the color stops accordingly.
 Creating the Plus Sign
- Use the Path Tool to create two dots, set the path's extrusion size to 3, and adjust the path size to 15 for x, and 0 for both y and z.
- Ensure proper alignment of the paths within the 'Plus Button' group, select both the path and the individual ellipse. In the 'Alignment' options, set both the x and y axes to 'Center’.
- Duplicate one path and rotate it by 90 degrees on the Z-axis for the plus sign, ensuring a center alignment.
- Select both paths, change the cap style to 'Round', and apply a cyan color, deactivating the 'Lighting Material'.
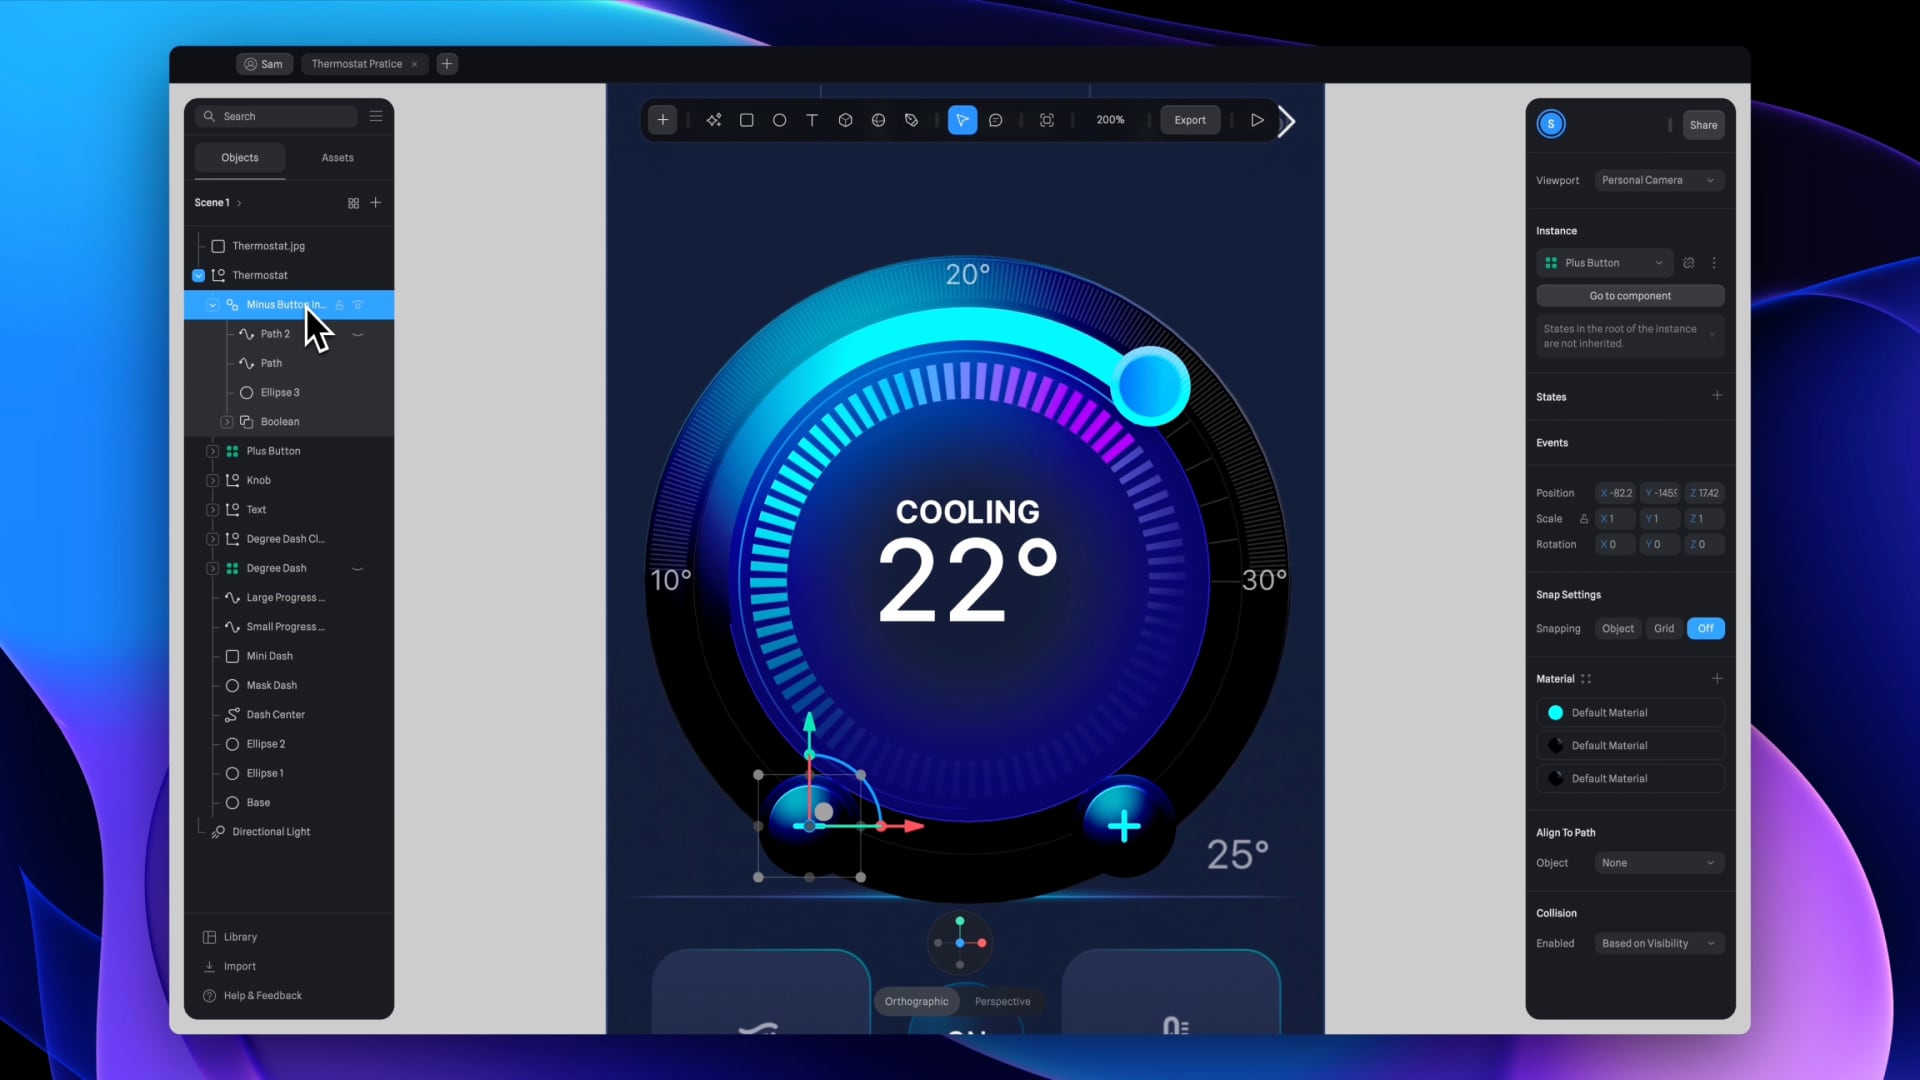
 Component Transformation and Duplication
Now, let's transform our 'Plus Button' into a component, indicated by four dots. Next, duplicate it to generate an instance of the component. Remember, any modifications made to the master component will be mirrored across all its instances. Rename the duplicated group to 'Minus Button' and hide the 'Path 2' layer.
Conclusion
You've now created a sophisticated thermostat interface using basic geometric shapes, materials, and turning elements into reusable components. Next, we will add animations to our thermostat.
Templates and source code
Download source files
Download the videos and assets to refer and learn offline without interuption.
Design template
Source code for all sections
Video files, ePub and subtitles
Assets
Videos
1
Intro to Spline for iOS and visionOS
Comprehensive 3D Design Course: From Basics to Advanced Techniques for iOS and visionOS using SwiftUI
7:25
2
Basic Shapes in 3D Smart Home
Transforming simple shapes into a 3D base for a house model scene
10:12
3
Materials, Lights and Effects
Enhance your 3D scene by incorporating elements from the lore ibrary and adding materials and lighting to add realism
12:11
4
Camera Animation and States
Creating dynamic scenes with the addition of animations
7:05
5
3D Thermostat and Cloner
Learn how to design a thermostat interface with basic shapes
14:38
6
Buttons and Components
Creating knobs and buttons elements and turning them to components
8:26
7
Path Animation and Rotation
Animating a Thermostat Interface: A Step-by-Step Guide
7:10
8
Create a 3D iOS App Icon
Crafting iOS 3D Icons: A Comprehensive Tutorial
7:09
9
Create a visionOS App Icon
Discover how to design the Photos app icon, enhancing the visual experience in visionOS.
9:53
10
Create 3D UI Scene
Learn how to design and implement 2D user interfaces to integrate within 3D scenes, enabling the triggering of actions on any 3D object
9:49
11
Particles Animation
Discover the new particle feature designed to create a range of visual effects like fire, smoke, rain, snow, and other dynamic phenomena
20:30
12
Export to SwiftUI Project
Crafting Stunning 3D Experiences: A Step-by-Step Guide with Spline for iOS Apps
16:20
Meet the instructor
We all try to be consistent with our way of teaching step-by-step, providing source files and prioritizing design in our courses.
Akson Phomhome
UI Designer
Designer at Design+Code.
13 courses - 60 hours
AI Design with Ideogram
Meet Ideogram, an AI-powered image generation tool that takes your ideas and transforms them into stunning visuals. Whether you're a designer, marketer, or just a visual enthusiast, Ideogram simplifies the creative process. In this guide, we’ll walk you through step-by-step instructions to create beautiful logos, social media posts, and more.
1 hrs
Build a SwiftUI app with Claude AI
This comprehensive SwiftUI course combines cutting-edge AI assistance with hands-on development, guiding you through the process of transforming Figma designs into fully functional iOS applications. Leveraging Claude 3.5 Sonnet, you'll learn to efficiently generate and refine SwiftUI code, create reusable components, and implement advanced features like animations and responsive layouts.
9 hrs
Prototype and Code iOS apps in Figma and SwiftUI
Welcome to our course on designing a sleek wallet interface with Figma! You’ll learn to create a visually appealing and functional wallet interface using DesignCode and Apple UI Kits. Master prototyping, swipe gestures, carousel animations, overlays, and reusable components. Plus, explore a Figma plugin to easily transition from design to SwiftUI. By the end, you’ll create dynamic, user-friendly prototypes.
3 hrs
Create 3D UI for iOS and visionOS in Spline
Comprehensive 3D Design Course: From Basics to Advanced Techniques for iOS and visionOS using SwiftUI
3 hrs
3D UI Interactive Web Design with Spline
Learn to create 3D designs and UI interactions such as 3D icons, UI animations, components, variables, screen resize, scrolling interactions, as well as exporting, optimizing, and publishing your 3D assets on websites
3 hrs
Design and Prototype for iOS 17 in Figma
Crafting engaging experiences for iOS 17 and visionOS using the Figma design tool. Learn about Figma's new prototyping features, Dev Mode, variables and auto layout.
6 hrs
Design and Prototype Apps with Midjourney
A comprehensive course on transforming Midjourney concepts into interactive prototypes using essential design techniques and AI tools
8 hrs
Web App Design using Midjourney and Figma
Get UI inspirations from Midjourney and learn UI design, colors, typography as a beginner in Figma
2 hrs
UI Design for iOS 16 in Sketch
A complete guide to designing for iOS 16 with videos, examples and design files
3 hrs
UI Design Android Apps in Figma
Design Android application UIs from scratch using various tricks and techniques in Figma
2 hrs
UI Design Smart Home App in Figma
Design a Smart Home app from scratch using various tricks and techniques in Figma
2 hrs
UI Design Quick Apps in Figma
Design application UIs from scratch using various tricks and techniques in Figma
12 hrs
Figma Handbook
A comprehensive guide to the best tips and tricks in Figma
6 hrs